Tiếng Việt
Blog, PolyUtilities, Projects
How to Create Banners & Announcement Sliders in Perfex CRM?
To create banners or announcements displayed on the Perfex CRM system after installing the PolyUtilities module, follow these steps:
Step 1: Navigate to PolyUtilities/Banners.
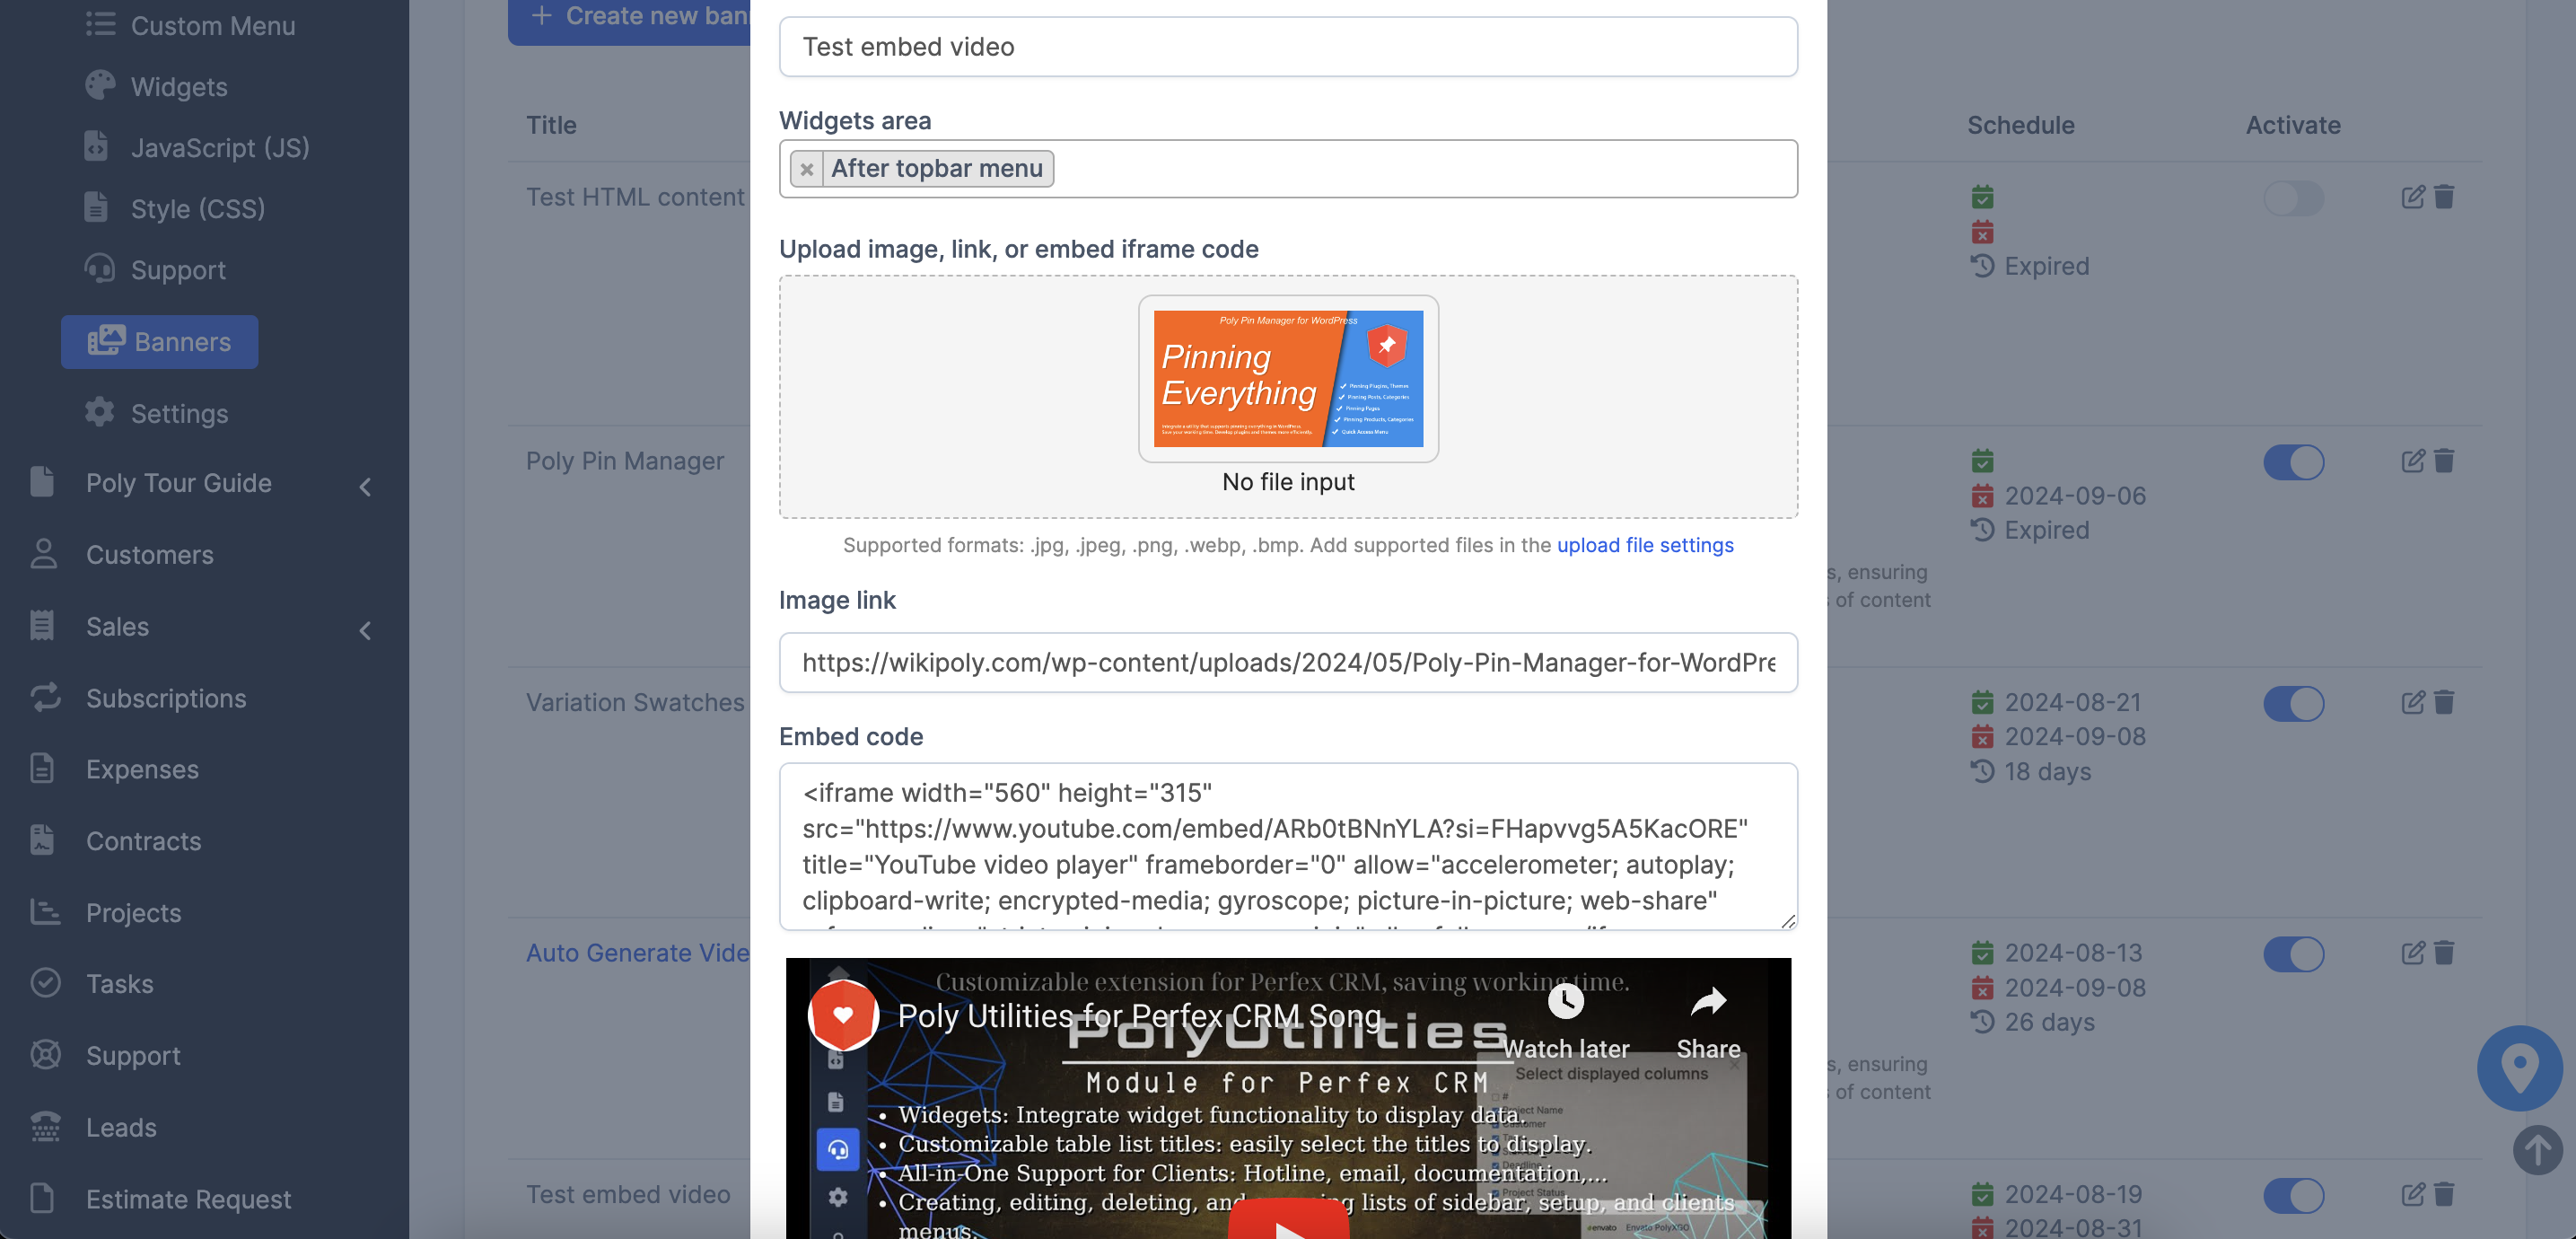
Step 2: Select “Create new banner” and enter the information for the banner to be displayed. Each banner currently supports the following parameters:
- Title: The banner’s title.
- Widgets area: Choose positions where the banner will be displayed within the system. Refer to the widget area list here.
Each banner media supports 4 types:
- Upload image: Upload a custom image.
- Link image: Use an image link from an external source.
- Embed iframe code: Insert HTML embed iframe code.
- HTML/Text: Custom HTML or plain text content.
- Date from: Start date for display. If not set, it defaults to the current date.
- Date to: End date for display. If not set, the banner will remain active if its status is enabled.
- Url: Redirect URL when a user clicks on the banner.
- Target: _blank for external sites, or customize as needed.
- Rel: For external links, set to nofollow if not transferring backlink authority to the URL.
- Is active?: Banner activation status.
Step 3: Configure animation effects for the banner slider under the Settings section.
- Activate all banner positions?: Enable/disable the display status of all banner sliders.
- Autoplay?: Enable automatic animation.
- Show controls?: Display navigation buttons on the slider.
- Thumbnails?: Show thumbnails on the slider.
- Transition effects: Supports fadeInOut, slide, flip, flipX, flipY, zoomInOut, jackInTheBox, rotateInOut effects.